Friday, May 4, 2018

Inverter Excitment in Congress, AZ

This is a post about the excitement we recently had with our inverter.  For those of you not familiar with an inverter, it is a device, ours is about the size of a breadbox, that provides 120 VAC when you don't have access to an external electric service.  It does this by taking the 12 VDC from a battery or bank of batteries and inverts that DC voltage into an AC voltage.  That way we can then use all of the 120 VAC appliances and devices in our RV when we are not plugged into a external electric power service.


During our stay at Congress, AZ in April this year we finally discovered what the burning rope smell was that we had been catching occasional whiffs of over the last few weeks during our winter visit in Yuma.  At first we had dismissed the smell as exhaust blowing back into our coach from running our refrigerator on propane on a windy day.  Later we noticed the smell when the refrigerator was not running on propane, so that eliminated the refrigerator exhaust theory.  We had a few more clues that we were not able to assimilate for a while.  We noticed the microwave oven surging during use on several occasions.  We even measured the voltage on the microwave circuit and observed it sagging from 120 VAC to about 107 VAC during a “voltage sag” event.  The microwave is one of our largest current using devices drawing ~17 Amps.  We dismissed the voltage sagging situation to an under-designed electric service at our RV lot.  Fast forward a few weeks, when we were just sitting down to dinner in Congress, AZ when all the stars aligned for us.  Right after giving thanks and asking for blessings, we started to eat and then we caught a whiff of the “burning rope smell”.  The thought that we had just run the heavy current using microwave oven, and that device is powered from the sub-panel which gets its power through the inverter transfer switch… it was then we knew we needed to inspect the inverter input-output terminal block immediately.  We decided to do that as the first task in the morning, and we were expecting to see a loose wire and some evidence of heating.  Well those expectations were far exceeded when we opened up the terminal block cover and observed the extent of the heating and resultant melting and burning damage!  We now know that we were extremely fortunate to have avoided a more serious electrical fire.


Below are pictures of our inverter and the terminal block cover; it looks innocent enough, but what lurks inside turned out to be frightening.
This is the cover that encloses the input-output Terminal Block. The input and output conductors can be seen snaking in from the left of the picture and entering the inverter at the lower right of the picture below.
We opened up the terminal block cover and this is what we saw!  Notice the wire at the far left; that is the output neutral or white wire feeding the coach sub-panel.  It’s not white anymore!
We pulled the terminal block out of the inverter for a closer look.  This is not good.  An entire lug was burned and melted right off of the terminal block!  We knew immediately that we had to make a change.  In fact when I first touched the screwdriver to the burned terminal lug, to totally fell apart, so we would not be energizing our sub-panel through the inverter until some change or repair was made.  We knew we would at least need replacement parts and even considered replacing the entire inverter with a new replacement, but at $1,600 we thought we would explore a lower cost repair first.
We decided that we would bypass the inverter immediately until we figured out how we would recover the inverter through repair or replacement.  In the picture below, we have removed the input and output #10 AWG conductors going into and out of the inverter.  The input comes from the Main distribution panel and the output then feeds the Sub-distribution panel.  Working with the #10 wires was not easy in the tight spaces.  That wire is very thick and stiff.  You can see the bottom wire that burned the most.  It was a white wire!  It burned the insulation completely off for about 3 inches, then another 2 inches was burned black.  You can just see the original white color where the wire enters the cable insulation and black corrugated cable shielding.
In this shot below we have the input and output conductors connected directly together which takes the inverter out of the sub-panel circuitry.  This way we can continue to use all of the circuits in or coach.  Now we can take our time removing the inverter.
Below is the inverter out of its compartment and sitting on our utility table in front of the coach.
The shot below shows where the inverter was.  You can notice that we bypassed the inverter by connecting the input and output connectors directly together at the left side of the picture.  The input black wire is wire nutted with the output black wire, as are the red, white and ground wires connected in the same fashion as the black wires.  In this way we still had full use of all the electrical circuits in our coach whilst we made repairs to the inverter.
Next step was to bring the inverter inside and pop the cover off and inspect for any further melting or burning, and then develop a parts list to replace all damaged parts and materials.  There is the inverter below opened up on the kitchen table.
Disassembling the various circuit boards and noting where each wire goes so we will know where to replace them as we reassemble the inverter.  The two internal neutral inverter wires melted and disconnected from the terminal lug!
 A black wire connection...
Top view.  The large transformer at the upper left is very heavy, probably close to 50 pounds.
There's where the blue wire plugs in...
We found 4 wires internal to the inverter that had some melting and or burn damage.  The two neutral output wires were the worst.  Two additional wires, an orange and blue wire had superficial melting on thier insulation so we replaced them as well.  Below we have the repaired inverter completely reinstalled and everything checked out.  Everything was functioning as designed.
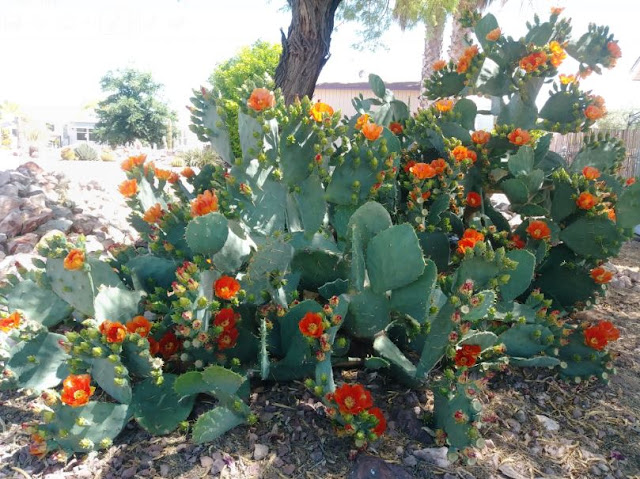
Final notes; our research found that a complete inverter replacement would have cost us more than $1,600.  If we would have purchased the AC Board (which has the wires that were damaged) and their terminal block that would have been about a $500 repair.  We went out and found the wire, the terminal block and connectors we needed all for about $50.  This was a win this time, but it could have gone bad very easily.  We will add this terminal block to our periodic torquing list to ensure that all wires a snug in their lugs.  We did discover that it is not going to be easy and maybe not possible to torque the bottom row of terminal lugs which contain the inverter internal wires, without removing and disassembling the invert, or at least removing the cover.  And that is the inverter excitement that we can all do without.  We leave you with some pretty cactus flowers of North Ranch RV Park at Congress, AZ...


Monday, April 30, 2018

SmartWeigh in Congress, AZ

We moved from Yuma up to Congress, AZ.  The weather is about 10 degrees cooler here in Congress.  We are staying at the Escapees North Ranch RV (Rainbow Park).  Escapees is a great RV Club, which we joined our first year on the road.  It is the oldest RV Club in the US and has a great membership of experienced and friendly members all eager to help each other.  There are many Escapee RV Parks across the country and for the cost of an annual membership you can stay at all of them for a great rate.  One of the many programs Escapees provides is the SmartWeigh program.  They maintain and operate high end weight scales that are set up to weigh both sides of each axle independently.  In this way you can observe how well your load is distributed within your RV.  Some things can be changed some things cannot be changed, but it is still good to know the loads and proper tire air pressures can be determined as well.  The timing worked out great for us, since we recently upgraded our truck, and the results we received were fantastic.  We are within tolerance of all of our capacity limits of truck front and rear GAWRs (Gross Axle Weight Ratings), truck GVWR (Gross Vehicle Weight Rating) and GCWR (Gross Combined Weight Rating); The trailer was also within all GAWR limits and the GVWR as well.  The process was very interesting as well.

Coming into the Wickenburg, AZ roundabout, we see the giant cowboy spurs...
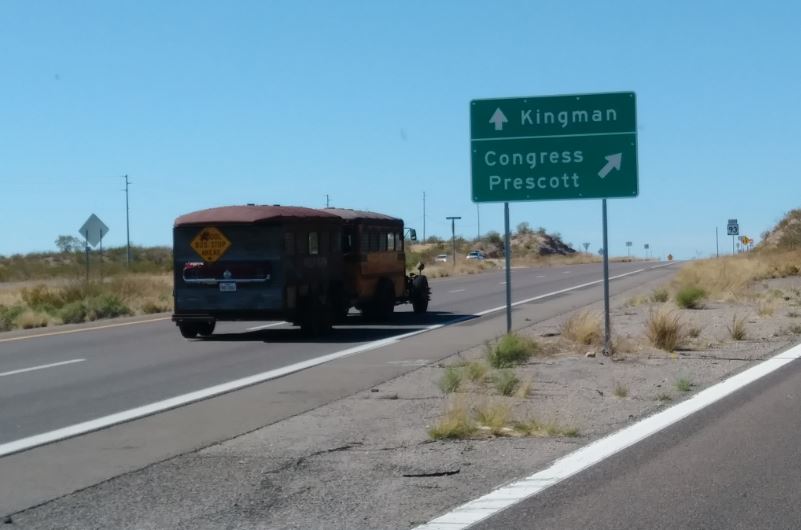
As we peel off toward Congress, AZ we see an eclectic School Bus RV conversion putter by...
 This way to North Ranch RV Park in Congress, AZ.
A little Easter cooking with Shilo
Oh yes, SmartWeigh... This is the flat and level concrete pad, with the precision scales in the middle.
A shot of the two scales that sit in a slight depression in the concrete such that the scale surface is level with the concrete pad surface to maintain the integrity of the RV's levelness.  These scales can be slid along the depression in the concrete to match the tire widths of each axle of the many different RVs that cross these scales.
A close up on one of the scales.  We were told that these scales are Swiss and cost in the 10's of thousands of dollars.  They operate by oil compressed within the scale.
We watched an earlier customer enter the process as Weighmaster Ron guides the driver to the scales for the front axle measurement. 
Front tires stopped precisely on top of the scales.
Ron makes the first reading.
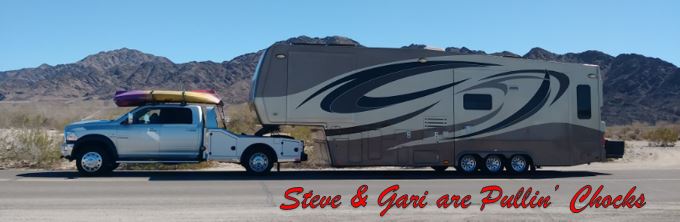
Now the Head Weighmaster George is involved with the rear axle measurement.  We can see Gari at the rear (you can tell by the kayaks on the roof), lining up Romeo for his turn.
Gari pulls ahead as Ron gives direction.
Ron stops the vehicle just ahead of the scales, then checks the position of the scales relative to the wheel width, then slowly moves the vehicle tires onto the scale.
The photographic documentation continues from inside the truck now, all passengers must be aboard for weighing.  We are hooked up to the trailer now and in the mirror we see Ron as he measures the high points of the trailer with his articulating measuring stick.
Gari makes a tight turn with Romeo and we document the kayak to trailer clearance... not bad.
We prepare to be debriefed by the Weighmasters and receive all of the data.
We witnessed one sad but exciting event that occurred in the lot next to our spot.  We took this picture from our door.  It's a little difficult to see the detail, but the husband and wife in the tan Travel Trailer had a situation.  For unknown reason the wife got into their Ford Pickup truck, which you can just see the back end of extending in front of the tan trailer; and she repeatedly rammed the truck into the front driver's side of the trailer crunching the front cap and bedroom slide of the trailer.  She also totaled the truck.  The front grill and radiator of the truck were destroyed.  We figure she totaled both truck and trailer in this event.  You can see the Sheriff car to the left Ambulance at center and Firetruck at right.  They ended up taking the wife away in the ambulance, we do not think she was physically injured.  As the wife rammed the trailer, backed up and rammed again and again probably more than a dozen times, the pitiful husband came out and stood there and helplessly watched as the wife reigned destruction upon their possessions.  He didn't yell or wave his arms, he just stood out of the way silently watching.  We feel sorry that they had to go through this.  At the time we didn't know what in the world was happening and thought we may be next on the list to be rammed!  Oh Lord that was an anxious few minutes in time.
This is closer up on the trailer damage.  The front cap is smashed, the front slide, probably the bedroom slide is all bent and racked.  The tongue jack is destroyed.
You can see how close we were parked to the action.  The battering ram pickup truck is parked next to it's travel trailer and you can see our truck with the kayaks on the roof and and our trailer right behind in the adjacent lot.
This is a close up of the truck that was the battering ram....  She totaled it.  The radiator is punctured.


Wednesday, April 25, 2018

Dancing with Hummingbirds

A quick post about two pass times in the winter desert... Saturday night dancing and watching the Hummingbirds nest and multiply.

Leading off with a Father-Daughter Dance at Caravan Oasis.
The first nest on the carport column of Jerry's Yuma home.  Two eggs ready to be hatched.
Two fuzzy little hatch-lings a couple of weeks later.
Getting bigger, can see the beaks better now... Soon they will be gone.
We interrupt this post about hummingbirds to display some magnificent light striking the Gila Mountains just so...
The babies are gone and the quarter shows the size of the nest.
Look!  a second new nest on top of the clothes line!  It is just right of the center mast.
One egg in there today...
 Now we see two eggs!
There is Miss Priss sitting on the nest.
 A sunset looking east in Yuma Foothills...
This crowd antes up for one of the last Five Crowns games of the season. Bring your quarters if you are going to hang around with this crowd.