The final touches on the Shop building have been as difficult as anything we have experienced since we have been visiting Idaho. We will share some of our perceptions on this latest effort to complete the remaining punch list items on the Shop. This post primarily addresses the horrible roof installation, although there were a number of other items on the punch list, the roof job was by far the largest repair and also the most difficult and critical to the durability and soundness of the building. We all know that water intrusion is a building's largest enemy over time. Therefore, we elected to install a standing seam metal roof because of the superior flashing design. In a properly installed standing seam roof system there should be zero exposed fasteners that penetrate the building envelope. This is why standing seam roof systems are sometimes known as the 100 year roof. Not that we will live to see 100 years of service, but we want to have zero maintenance during the time that we are here.
The individual roof panels were installed in a fair manner during the original install in December 2020. The roof panels were laid very straight and that is about where the quality of the standing seam roof install ended. All of the trim installed, the gable end rakes, the eave ends and the ridge cap were all unmitigated disasters. The crew that performed the original install clearly did not have the slightest idea of the correct methods to install a standing seam roof. Although the roof panels were laid straight, the install crew did no layout, they just started with a full roof panel at one end of the roof, and as a result the last panel was a slim fraction of a panel. In a proper layout, the installer first measures the roof and determines the width of the first and last roof panel. Then the first starting panel is trimmed to width, so that the last panel will be of similar width. In addition the install crew started the first panel approximately 3 inches from the gable edge of the roof. Luckily we were able to have a custom gable rake manufactured that would span and cover the first standing seam, plus the holes they install crew left exposed in the roof out side the original step rake. What a mess!
A primary technique in finishing trim on a standing seam installation is the use of Z-Channel metal and butyl mastic for sealing the trim and flashing work. The original install crew did use some Z-Channel but no mastic or sealant. That was a complete fail. Additionally the install crew employed a Step Rake which does not require Z-Channel, although they did install Z-Channel, albeit upside down and backwards! What a mess! We knew that the roof had serious problems when Steve went up to reattach a piece of fascia trim that had blown loose. The install crew only used two screws over the length of several 10 foot long fascia trim pieces. No wonder it blew loose, we are only surprised more didn't do the same. What a mess. That's when we saw dozens of exposed fasteners penetrating the envelope of the building. In addition we found a dozen or more holes drilled into the exposed roof surface and left open! Who does that?! What a total mess! However, it didn't stop the construction company from sending us the full bill for a completed construction. We immediately informed the company that we were not sending the full amount and we held back approximately 10% of the contracted price of the building until the punch list items were corrected. We had 7 or 8 items on the punch list, most minor issues, but the roof and concrete apron were the largest and most egregious.
Gari observes Brandon and Kerry on the roof. The guys came out Saturday upon our request. Prior to starting the repair we required the company to provide covering for any roof are left exposed overnight. We were told, 'it's only trim, the replacement pieces will go on the same day the old trim is removed. Nothing will be left uncovered overnight.' That turned out to be another of many falsehoods given to us by the company. On Friday when the crew finally started demolition, after a week of trying to get the correct materials, they opened up ~70% of the roof trim, (Steve stopped them from removing 100% of the trim as they were proceeding to do) only to later discover that they didn't have the proper screws to reinstall the new trim pieces. Finally on Saturday Steve working with the crew, were able to install the north gable end rakes properly, and temporarily re-secure the ridge cap so rain would not enter. What a mess!

The shot below is from Friday, the day demolition began. On Monday the company was waiting for the Ridge Cap; although we were told that the materials for the roof repair were ordered back in July or August. Funny thing, we had decided to go in on that following Tuesday and terminate the contract, but that Friday prior we received a group text message at 4:30 PM (COB Friday), organizing in real-time the crew to come out on Monday and begin our repairs, at the same time asking us if that was acceptable. We just texted back, Please call us. No call back after an hour, so we texted back what materials do you have? "Sheets and Trim" was the reply we received. So they did engage with 3 words in a conversation that they started at COB on Friday. What a ridiculous mess! We then replied with a page long text, asking if they had mastic sealant, silicone caulk, and custom Ridge cap to cover holes that were left below the Z-Channel in the original install. We also asked if the gable rakes would span the distance where the starting roof panel was improperly attached to the roof 3 inches from the gable edge of the roof. It should have been installed flush with the edge. In addition, would the gable rakes cover the holes left in the roof panel? No reply. All questions we had asked multiple times prior in the preceding months earlier. No reply then either. Consistently horrible communication from that company. We just decided we would prevent the crew from starting work upon their arrival until we saw all the materials and understood their plan for repair.

Monday came and went, no crew; they were waiting for the ridge cap that was supposedly ordered two months ago. It is a three day delivery at the local steel supplier, so that is false that it had been previously ordered. Don't people realize how transparent their lies are? Apparently not. Tuesday the crew showed up and Steve had a ten minute sit down with the entire crew upon arrival to discuss the problems and the approach to repair. We were led to believe that this would be a two day repair. Tuesday the crew started with securing the eave edge of the roof metal, where the original install crew cut the roof panels too short and did not hem the eave ends. This makes the roof vulnerable to water intrusion from possible ice damming. The agreement was to insert silicone caulk under the roof panel to help seal the panel to the drip edge, then install 3 pop rivets to hold the end of the roof panels down. To the repair crew's credit, they determined that 4 pop rivets per roof panel would be better than three because of the striations in the panel that help reduce oil canning of the panel. Very nice attention to detail from crew lead Brandon. The crew finished the eave pop rivets and silicon sealant on that Tuesday and also discovered that they did not have the Z-Channel necessary to install the gable end rakes on Wednesday. What?! (a mess). They have known they needed Z-Channel to make this repair since May! The company was unable to obtain the Z-Channel until Thursday afternoon, so no crew on Wednesday or Thursday at the site. Friday the crew reappeared on site with the Z-Channel needed for the gable end rake installation. And Friday was when the demolition began.... Below all three guys on the roof, L to R, Brandon (Lead), Kerry, and Ty.

This shot below from Friday, Brandon giving instructions from the ladder, to Kerry and Ty removing the silicon that we had installed after we discovered all the holes and unsealed seams left in the roof at the original install. At this point the crew had the entire north gable end rake removed as well as the entire ridge cap.

Notice that now only two guys are in the picture below? Kerry and Ty were left to their own devices when crew lead Brandon suddenly disappeared from the job site. He didn't tell us that he was leaving, he just disappeared. We just noticed it when we heard Ty and Kerry discussing how they were supposed to reinstall the new ridge cap. We immediately knew that we were in big trouble.... again. What a mess! Steve immediately called Brandon but, received no reply for awhile. Steve yelled a bit and told Brandon that he needed to get back here ASAP because his crew did not know how to make the necessary repairs. Brandon said he would be an hour! Steve said that he is going up on the roof to assist the remaining crew in how to properly complete the re-installation. What a mess!

When Steve got on the roof, he discovered the crew did not have the proper screws to reinstall the Z-Channel vents. We had picked up screws from the ground when we had returned last April, as the original construction crew did not run a magnet or do any clean up around the building as promised. In that garbage we found about 100 Pancake screws, the proper screws for this job, so we used those salvaged fasteners. Because we lacked an appropriate number of Pancake screws needed to re-attach the ridge cap Z-Channel vents, we only put two screws per vent. However, this did not seal the mastic underneath the Z-Channel completely, so Steve asked Ty to caulk the back of the Z-Channel vent seam to complete the seal. When Steve inspected the caulk job, most of the beads did not seal the seam because not enough caulk was applied. Steve tried to coach Ty on the angel of the caulk gun to apply a more liberal and correct bead, and that is when Ty admitted that he had never used a caulk gun before. What?!

In the picture below, you can see a Z-Channel vent piece and the striations in the roof panel and how the two screws did not completely seal the foot flange of the Z-Channel vent piece. You can also see the original holes, where the vents were attached only metal to metal. When Brandon finally brought more of the correct Pancake screws to the site on Friday, we placed a screw in every slot which resolved the mastic sealing issue. You can see a couple of Pancake screws in the shot below. They are ungasketed screws with a low profile flat head and a broad square shoulder to hold the metal beneath down securely. They are the proper screws for a standing seam roof installation. The plan was to remove the roof ridge Z-Channel vent pieces and reinstall them lower on the roof to cover the exposed holes that the original install crew had left exposed below the Z-Channel vents originally. The Z-Channel vents were easy to remove because no sealant or mastic was originally used. That was a total fail, but it certainly made it easier to remove the Z-Channel vents. When the ridge cap was removed and the Z-Channel vents were exposed, it was discovered that many of the Z-Channels were not fastened to any wood structure, rather they were merely screwed sheet metal to sheet metal, and they had used a smaller shouldered gasketed screw, which were pulling through the slots in the Z-Channel. In addition, only two screws per vent were used. What a mess! A total fail and disaster of an initial install. We knew the job was incorrect and bad, but we had no idea what surprises lurked underneath before things were disassembled.

Below a shot of the reinstalled Z-Channel vents lower on the roof. Mastic applied, Pancake screws on 3 inch centers sealing the mastic, and attached into good wood structure underneath. Now it was time to snap on the new wider ridge cap. Oh wait, the ridge cap is two inches too narrow and won't go on. You have got to be kidding me! What a mess. Now we wait for Ridge cap to be re-manufactured and hope that it is ready before the rain sets in as forecast. So much for it's only trim and we will replace it the same day it is removed. It has been five days exposed at this posting. What a mess!

Gari and Brandon devised a way to temporarily recover the roof ridge opening. We used the new wider, but not wide enough Ridge Cap, snapped it to one side of the Z-Channels and used thin strip clips that Brandon cut on site from the old Ridge Cap metal. This didn't quite cover the other Z-Channel top flange, so Steve and Gari cut the old Ridge Cap in half, pushed those pieces onto the other side of the Z-Channel and tucked it under the new wider Ridge Cap and then reinstalled the temporary clips to hold the entire assembly. That covered everything, now if it will just hold until the correct Ridge Cap becomes available. What a mess! This is a YouTube link to a simple video demonstrating the proper installation of the elements to a standing seam ridge cap installation, https://youtu.be/ScLFxyUZ2gk

Oh the concentration as Steve, Kerry and Brandon work to install the north gable end rake trim. It turned out just right, a fully successful first win, and it's only Saturday of the first week of work on a supposed two day job! This YouTube link shows a short and simplified video of a correct install procedure for a standing seam roof Rake trim,
https://youtu.be/wuOfM5-XnwQ The shot below actually shows the completed north end gable rakes installed. They look good and we have high confidence that they are well sealed and that we won't have to do anything with them again. Hooray!
Below are some pictures of the first gable end rake going on. Crew lead Brandon carries the second Z-Channel metal to the install location, Kerry stands ready with the caulk gun to seal the overlap. The Z-Channel was started at the top of the roof, so that the overlap seam is flashed downward. Three or more beads of silicone caulk were applied to the overlap between the Z-Channel elements. Good job!
Kerry applies pancake screws on 18 inch centers (note the tape measure in one hand and the drill screw driver in the other). Second Z-Channel in place, well done!
Below, Brandon bends the edge of the trimmed roof panel up as a flashing technique. This upturn, behind the mastic sealed Z-Channel acts as a second line of water intrusion defense in the unexpected event that water should get underneath the sealed Z-Channel. The up bend will prevent the moisture from going over the roof edge and running down the building fascia. It's sort of a belt and suspenders approach and a best industry practice. This will send any offending moisture down the roof and over the drip edge with no harm caused. Steve applies silicon caulk to the errant holes left in the roof metal panel which is behind the Z-Channel. Kerry waits below to attach the Rake trim element. A much improved install!

Below Kerry pre-drills pilot holes for gasketed screws to fasten the Rake trim to the north gable end of the building. Steve holds the rake member in place as Kerry runs in the screws. The Rake elements are started at the bottom of the roof. Similarly, the rake elements are overlapped with three to four silicon caulk beads applied to the overlap between rake elements, which are flashed downward. Correctly done, good job!
Close up on the rake re-install action. Final rake element going in. Looks good.
We are grateful that the construction company finally sent over a crew to repair the egregious problems with the standing seam roof install. We are sad that they waited until late September when they have known about the problems since May of this year. Oh yes, we have emailed, called, texted, sent many pictures with explanations of the problems, sent information for correct installation, and even showed up in the office several times. We couldn't leave to visit Gari's dad for his 87th birthday and leave this company onsite without our adult supervision. We have very low confidence in their commitment and abilities at this point, and zero trust. So we missed dad's birthday waiting for these knuckleheads to get their act together. Rant over.
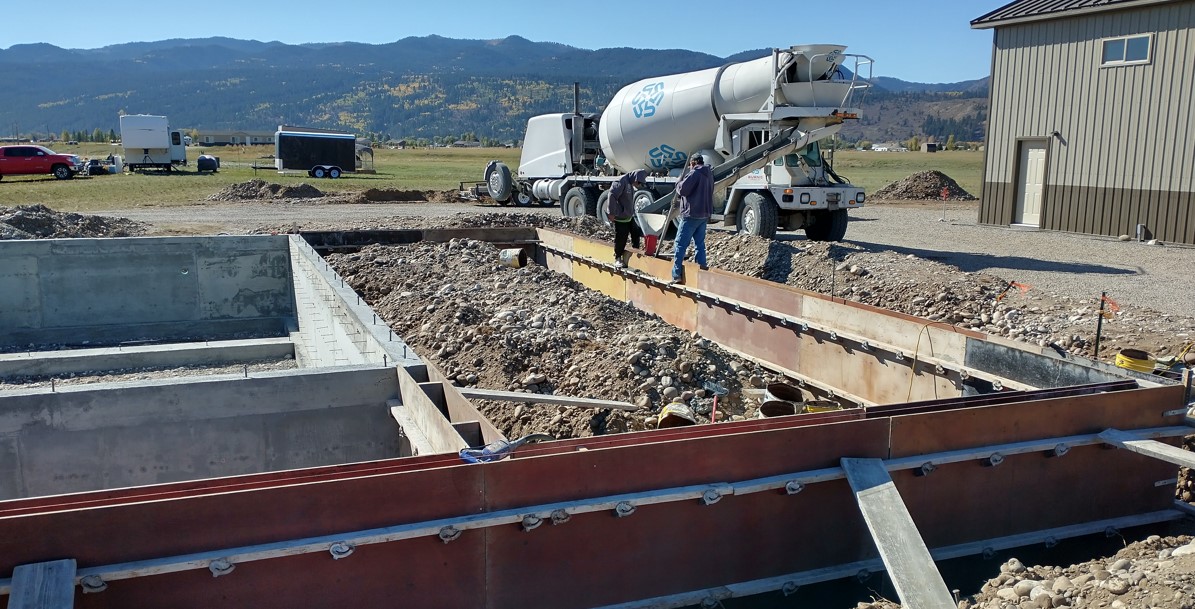
On a different note, the concrete crew constructing the house foundation, completed the last pour for the year yesterday. This leaves only the flat work to be completed next spring. That is the garage and wrap porch slabs. These two guys did a great job. Did everything they said they would do when they said they would do it. Showed up on site every morning at 8:30 AM and worked each day to a logical conclusion for each day, and positioned themselves to be ready for each of the four pours they accomplished. Some contractors still care about their work and have developed excellent trade skills over time. These are the folks we always want to work with.