This was a job that we were very uncertain about. We agonized over when, where or even if we could accomplish this job. It turned out to be much easier than we had imagined. The seal that had failed was the double wiper slide seal on the aft wall of the front bedroom slide.
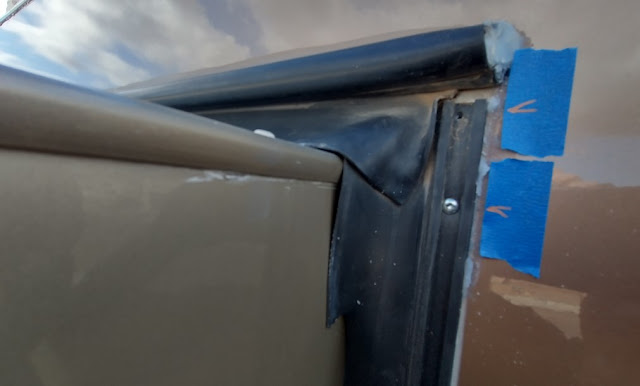
The shot below is where the double wiper seal failed near the top of the slide. The rubber seemed to turn to tar and started to come apart each time we ran the slide in or out. The seal system is made up of two parts. The double wiper part wraps around the edge of the slide opening in the side of the trailer. The second part is a D-Seal that slides onto the track that is part of the double wiper seal base. Together these two parts create the entire seal system around the perimeter of each of our slides.

One of the most difficult parts of this project was finding and receiving the replacement parts. The double wiper seal came in a 14 ft length and was shipped via freight in a long cardboard tube. Below is the second attempt at receiving this part. The first was damaged in shipping.... and so was this second attempt. The other thing that made obtaining the part difficult is that there is only one manufacturer and the 14 ft length of the double wiper seal sells for $230-$260! yep, we couldn't believe it either, but it's true!

Each time the shipper intentionally folded the long protective cardboard tube in half. The cardboard tubes had 1/2 inch thick walls and would not be easily damaged this badly. The tubes were ripped all the way around as if they were folded and unfolded more than one time. As a result the stiff plastic base of the double wiper seal was permanently deformed. Since we had not taken the existing seal off, we were not sure how everything went together and therefore could not be sure the damaged/deformed seal base would be usable. In any event we went ahead and accepted the second damaged shipment and decided that we would just see what happened during the repair.

Below is a shot of the new double wiper seal end or cross section. The top part is the seal base and is what wraps around the wall edge at the slide opening in the side of the trailer. The vertical channels on each side of the top base are that track that the D-seal slides onto. The long flat rubber flaps that the hand below is holding are the double wipers that seal the sides of the slide and prevent air or water from entering the trailer.

The shot below shows the D-seal removed from the outside of the offending seal system. We marked the screw holes with the blue tape and gold marker for an alignment aid when refitting the new seal. The top screw hole is where the D-seal is held in place. The remaining screws going down the seal hold the double wiper seal in place. These screws are placed about one foot apart down the entire length of the seal. It was not difficult to remove any of these screws. We did have to remove some caulk at the top corner of the slide to get at the top most screw and release the D-seal. Not a big deal.
Below Steve releases the adhesive weather seal that is on the exterior base of the double wiper seal. It was really sticky stuff with a foam liner. Very good at keeping air and water from getting behind the seal, and a bit tedious to remove, but not anything that was impossible.
An inside the trailer view of the old double wiper seal not yet removed. The D-seal is already removed in the shot below. Because there is no clearance at the ceiling or the floor on the inside of the trailer at this D-seal location, we just pulled the D-seal off of it's channel on the double wiper seal instead of sliding it nicely off the top or bottom of the track. That was simple, but perhaps the most difficult task of this entire job was getting the new D-seal back ONTO the new double wiper seal on this inside location.
Below we are taking the last screw at the bottom out of the double wiper seal. The access space is a little tight on the inside, but we used a flexible screw driver bit with our cordless drill and it was no problem.
Having completed detachment of the weather strip adhesive, Steve pulls the old and damaged double wiper seal away from the slide opening.
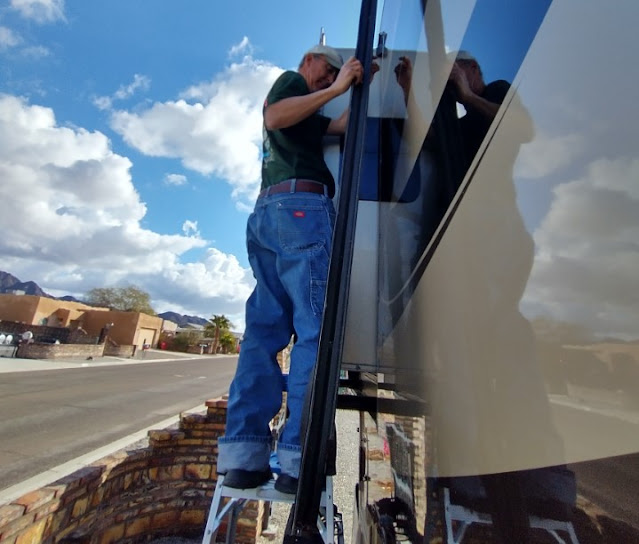
Gari climbs the ladder below to remove the remnants of the weather strip adhesive that remained on the exterior trailer wall. As with all painting and sealing jobs, most of the effort is in preparation of the surfaces, so that the paint or sealants will adhere very well. Gari scraped and followed with contractor solvent, then finished with denatured alcohol. Clean as new!
Below the new double wiper seal (the long piece) laying next to the failed seal. There was some trimming involved to shape the seal base and length to fit the slide opening.
Using a gold marker, tin snips and good scissors the trimming was not especially difficult. The red strip that you see on the seal base below is the backing on the adhesive weather strip, which will be removed once the seal is in place. You can see below where we marked the new seal with BI and BO - Bottom Inside and Bottom Outside for a little situational awareness aid during installation.
Below is a view of the exterior of the bedroom slide with all aft vertical seals removed. All clean and ready for the new seal to be installed. The blue tape marks the existing screw holes, as we will try to reuse the existing holes.
Close up of the bottom two screw holes.
Below is a view from inside the trailer with the old seal removed. There is plenty of room between the slide and the edge of the opening to move the new seal into place.
Again, an inside view with the new replacement double wiper seal installed as a test fit. It looked good, so we continued with the installation.
Back on the outside below, Steve begins to remove the weather strip adhesive backing and fix the double wiper seal into it's place.
With the weather strip firmly adhered on the double wiper seal, Steve begins replacing the screws that affix the wiper seal.
We used the blue tape markers to estimate the location of the existing screw holes now hidden by the wiper seal base, and we used a short and sharp awl to probe through the seal base to find the existing hole. Once the tip of the awl went into the hole, we were able to drive it though the seal base and open a pilot hole for replacing the screw back into the existing holes. You can see Steve using the awl below. This approach worked well.

Below the D-seal is started on the double wiper seal track on the outside of the slide. It was easy here on the outside, because of the generous open space below the beginning of the track. Replacing the D-seal on the inside was a whole other story. We don't have any pictures of that inside operation because we were in mild crisis haha! The process used on the inside was deforming the D-seal base to go over the double wiper track and just snap into place. The stiff plastic base materials of both seals made the inside D-seal replacement process difficult and a bit tedious, but not impossible!
Steve finishes sliding the D-seal up the track on the exterior wall. You think he would be smiling more as the job is just about finished.
Steve re-installs the last screw holding the D-seal at the top of the slide. Job completed. That was not nearly as terrible as we had anticipated.
No more tarry, leaky seal. We can sleep more comfortably now!


