Wednesday, October 28, 2020

Leaving Week

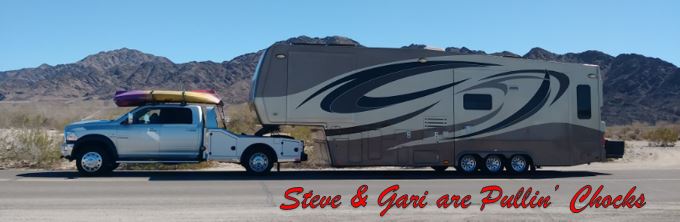
We have a plan to depart Swan Valley this Friday October 30th.  We like to pull out around 9:30 AM.  This is because most of the morning rush hour with everyone trying to get to work is over.  By 9:30 AM most everyone is already at work, and the other good thing is they haven't left work for lunch yet and that makes for less traffic and ease of pulling our behemoth trailer Penelope.  We call ourselves 9:30 People.  That's the plan and we will soon see how it pans out.

The Shop build is not complete, but we haven't missed seeing it completed by much.  This week has been very eventful on the job site after the last week and a half of nothing but crickets there.  Monday morning we arrived fairly early and the temperature was still in the low 20s.  Gari keeps warm by the job site fire.

The crew got most of the house wrap applied to the walls.  It's not real pretty, but it will suffice for a Shop.
Red up on the lift staples more house wrap on the back of the Shop.
Derrick the crew lead installed the second and last personnel door.
We even got the deadbolts and lever handles installed and Derrick turned the four keys over to us.
Lots of steel parts arrived on site Monday, so this was very encouraging.  Because it was so cold Monday morning we didn't think anyone would be out there as we rode out to check our project site.  So this was a great surprise.  The steel you see below is wall, J-Channel, Ridge Cap/Vent, door wraps, and various flashing.  We are told the Standing Seam Roof steel will be roll formed onsite this Thursday, the day before we depart.  We were very close to getting this build completed before we left the area.  We think we have missed the end by a week or so.  We think that was pretty good and are happy; however it sure would have been nice to lock the door then leave.  We will have our agents do that for us in our absence.
Then there is the story of the Z-Channel.  An interesting feature of this design is that the 6" concrete slab had a 1.5" notch formed all around the exterior wall areas of the build.  They did this by tacking a 2"x2" to the top of the perimeter concrete form boards.  The idea is that the wall steel will extend down past the top of the slab and seat at the bottom of the concrete notch.  After we thought about this a bit, we realized that the OSB sheathing did the same thing and also became in contact with concrete.  This is not a good situation; untreated wood should NEVER be in contact with the ground or concrete.  We asked about this, and were told they would block the OSB up off of the bottom of the notch by an inch or so; the notch being about 1.5" high.  We thought that would be better and was acceptable to us.... but that didn't happen, so we asked the foreman to trim the bottom of the OSB after it was in place.  They did that without complaint.  The next strategy we employed to their design was to add a Z-Channel to the bottom of the wall OSB sheathing, underneath the house wrap.  We were given this idea by a new friend and former builder here in the area.  We thought it was a great idea and would prevent most all of the moisture from getting back into the bottom of the wall.  The Shop builder was very receptive to the idea and ordered the Z-Channel flashing; below Red and Paul install the first section.
That is not the end of the Z-Channel flashing saga... It turns out the flashing was bent with a top flange of only 1" high, but the concrete notch is every bit of 1.5" high, plus the flashing would have to be attached precariously low on the OSB.  To make it work, the foreman directed that the crew lift the flashing up off the seat of the concrete notch so they could get a nail into the OSB and be above the top of the concrete slab.  After we thought about this for an hour, we went to the foreman and told him we didn't like it; that the Z-Channel design was just wrong.  The foreman agreed that the existing design was not viable and that the top flange should have been taller than the concrete notch; we settled on re-bending the Z-flashing with a 3" top flange.  We are advised that the new Z-flashing should be back on site this Thursday.  Once the Z-flashing is back in, they can begin installing the wall steel.  Problem solved?  We shall see.
Derrick and Paul up on the lift install J-Channel trim around one of the 7 windows.
While all the building was going on, our across the road rancher neighbor moved his herd of cattle to the pasture to the east.  The brave black lead cow knows just where to go.  And just like the neighbor cows we will soon head to our winter pasture in Arizona. 
A parting shot, soon to be the last of this season...


Thursday, October 22, 2020

Happy Halloween

Nothing happening at Eagle View this week, so we took a hike up Sheep Creek. Below a view near the top.  That view is looking down into the Snake River valley.  We saw a squirrel and some other sh*t, specifically bear sh*t, raccoon sh*t and Elk sh*t.Gari checks the GPS two miles out and 950 ft elevation gain.

Gari goes over the hill to look down into Sheep Creek valley.
Moving through a stand of Aspen
A cold deserted Eagle View today.
Snow on Mt Baldy heading out Eagle View driveway.
Happy Halloween from Swan Valley, Idaho.


Saturday, October 17, 2020

Not the Best Week at Eagle View

This week at Eagle View has been somewhat disappointing.  Although, we will say that the air has cleared up quite a bit from all the hazy forest fire smoke we have been experiencing here for the last three weeks or more.  The rain this past weekend and the cooler temperatures we think are what cleared much of the smoke and fire.  The ground is very dry here, so the rain is welcomed, but it does no favors for the unprotected OSB sheathing on the Shop.

Below is a shot standing at the Shop and looking towards the Palisades Dam.  It hasn't been this clear for weeks.

Monday was a good start, but ended on a down note.  The excellent foreman Craig let us know he would be on a different job on Tuesday.... which we thought was for that day, but we didn't see him again this week, and we had an issue with the attic venting construction to discuss with him.  After Monday, the crew was also down from three workers and a foreman to two people which included the substitute foreman Derrick.  The progress was definitely impacted by half a working crew.  And to top it off one day no one showed up due to vehicle problems, and one day we got to the site at 1 PM and everyone was gone.  Not a lot of time is left in a four day work week with a full day and a half of  not working.  To round out the bad week one of the two workers that worked Thursday (last work day for the week) had just broken two ribs.  He shouldn't have been there at all, and was productive as a half man or less.  We were a bit disappointed with the lesser progress this week, as we prepare to depart the area for Arizona at the end of the month.  We were hoping to have the doors installed and lockable so we could store some personal items in the building that we won't need in Arizona.  The extra week we made up earlier in this build, we just lost this week.  The crew did complete the gable end sheathing, that's Derrick up on the lift Monday finishing off that task.

The windows went in on Tuesday morning, the morning we were grocery shopping.  We aren't sure why they put them in before completing the house wrap... but here we are.  The short crew also installed the roof underlayment.  We were expecting 30# roofing felt per contract, but ended up with a woven polypropylene product.  We called the manufacturer to learn more about the poly product and we were satisfied that it was equal to or better than the old style paper felt product.  It certainly is stronger and degrades more slowly and may be the new industry standard.  Surprise.  The crew also cut out the two personnel doors and started with a scrap of house wrap, which we thought was odd and patchy.  The shot below is looking at the rear of the Shop, looking north.

On Thursday morning (Wednesday was a vehicle problem no show day) a little more house wrap was installed.
Rear of Shop below.
Cutting out the full height of the 12'W x 10'H rear overhead door.
A shot of our temporary bridge from the lot onto the hard surface road to the east.  Mt. Badly is seen in the distance.  The bridge was built up with excess material from the drain field site excavation.  The round river rocks certainly don't lock up very well and the bridge remains a little marbley when we drive across it.  More work required there.  We will also increase the width and feather the edges to accommodate bringing our hooked up coach in this way.
Below is a shot looking back at the Shop from the hard surface road looking to the west.
Derrick up on the lift, builds up the "Bird Boxes" along the eaves.
A simple design.
The 2x2 along the wall and the fascia board are the structure to which the perforated soffit material will attach.
The view below is addressing our vent issue which we worked with Derrick in Craig's absence.  Derrick is on the roof with his circular saw opening up a vent area along the ridge of the roof.  When framing, the crew was uniformed that a ridge vent was to be installed.  When pointing this apparent error out to the contractor, the manager Josh proposed installing gable end vents.  We said that we would consider that, and after researching a bit, we decided it was best to stick with the ridge vent.  What we learned was that a rule of thumb for exhaust vent area is 1 sq-ft of vent (minimum) per 300 sq-ft of attic area.  Our ceiling area is 1800 sq-ft, so 6 sq-ft of exhaust vent is needed.  OK we thought.  We started looking at gable vents and found that they are specified as having a certain sq-inch area of venting.  Since we need two each 3 sq-ft vents, that equals 430 sq-in for each vent.  The largest vents we found were only 135 sq-in of vent area.  That was going to be significantly inadequate, so back to the ridge vent we went.  Derrick's plan was to cut about 1 inch on each side of the ridge board.  That would give about 1200 sq-in of open area and should be adequate.  Derrick got it done, but it wasn't pretty or easy.  Gari searches for discarded nails below.
Finishing the vent cuts.
A view of the vent area at the roof peak from inside.
Gari is ready to move in below as she pitches in on the clean up detail.
We have a door!  Derrick hangs the first personnel door at the end of the day.  Will he get the second door hung today?  Nope.  After installing the last screw, we noticed that the door threshold plate was about 1 inch above the garage slab.  The protection blocks stapled to the bottom of the door jambs were not removed prior to installation.  So Derrick had to completely remove the installed door, remove the blocks and reinstall the door.  That fix ran out the clock on the last work day of the week, so we wait until next week for the second personnel door.  Boo.
There it is.  The lever handles and deadbolts are being re-keyed and should go in soon we are told.
A view of the finished progress for this week.  Gable end sheathing completed, some house wrap installed,  attic vent issue resolved, windows installed, and one personnel door hung.  This week's progress didn't match previous progress.
View from inside looking out the front of the Shop.
Looking out the back door.
A nice clear view of Mt. Baldy, no smoke haze.  We are told that steel siding and roofing should begin by Wednesday next week.  Until then we expect nothing to happen on the job... after this week, we are not holding our breath for metal Wednesday either!  We remain hopeful as our departure date rapidly approaches.  Either way we are feeling quite fortunate to have gotten as far as we have this season after just finding the lot in May.  We have a well drilled, a septic system in, electric service in to transformer, driveway access established and most of a shop built!  When we return in the spring we will finish installation of the electric service and wiring of the Shop, install the pump in the well, run the water and sewer lines to the Shop, and finish off the driveways with gravel.  That should allow us to move onto and live at Eagle View... hopefully before next summer is over!


Saturday, October 10, 2020

A Crane at Eagle View

We see Sandhill Cranes at Eagle View, but this particular crane was of the lifting variety.  The framing crew had constructed two double roof assemblies on the ground.  Each roof section consisted of three trusses, each connected to the next truss by 2x8" roof purlins, and 2x6" ceiling joists.  The plan was to lift the pre-constructed assemblies onto the top plates of the Shop walls.

The shot below shows the situation the morning of the planned roof lift.  All the wall blocking is in, the windows and doors framed, some wall sheathing added for wall stiffness, and the walls were plumbed and braced with long 2x4"s.

In the shot below of the west side of the Shop, you can see the three 4'x2' window frames up high.  There will be matching windows on the opposite side and one more matching window on the back wall.  We included these to let more natural light into the Shop.
Morning moon in a west window frame.
Here comes the crane up the driveway right on time, 9:30 AM MST.
The driver/operator picks his spot and sets up the stabilizers in short order.  He raises the boom preparing for the first lift.
The operator swings the hook over the first target.  You can see the rigging straps indicating the significant breeze that morning.
The framing crew quickly secures the lifting straps to the roof assembly that was inside the Shop.
First roof assembly going up!
Fighting the wind to set the first roof section into the proper position.
First roof assembly in place, the crew removes the rigging straps 23ft above the Shop slab!
Without missing a beat, the crew secures the second roof assembly to the lifting straps.
Up goes roof assembly two...
The operator swings the roof assembly toward the front of the Shop, Craig the Foreman pulling the guide line below.
Second roof assembly just about in place at the front of the Shop.
Once the crane was gone, the crew began to make fine position adjustments on the roof assemblies and walls.  Derrick tweaking with a lever from the top and Craig used the ratchet straps inside the Shop to make the final position adjustments before the final fasteners were installed.
Once the two roof assemblies were fastened into place, the crew began to install the 2x8" roof purlins and 2x6" ceiling joists connecting the two sub-assemblies.  That will complete the framing of the roof members.
Gari reviews the progress at the end of the crane day.  There appears to be a few missing ceiling joists in the middle roof bay.
End of crane day shot below.
The following day the roof sheathing and wall sheathing of 7/16" OSB was going up quickly.
The second course of OSB is staged and ready to go up, as Derrick works the final cuts up on the roof.
The long shot below shows that Troy of Valley Excavation has covered over the drain field as the framers have been busy with the Shop.  The small pile of 3" Idaho sand is the cover for the septic tank.  We will leave that uncovered for now, and when we return in the spring and install the sewer lines going to the Shop we will then complete the backfill job at the septic site.
The shot below looking in a front door of the Shop and out the back to the south.  You can see some of  the window rough openings up high in the shot below.
Wall and roof sheathing going on!
We installed a couple No Trespassing signs, one at each driveway.  This shot is looking west from the hard surface road.
Gari policing up the site at the end of the next day.
The crew pretty much finished all sheathing with the exception of the two gable ends.  Awesome crew!
Looking east below.  The haze from the California, Oregon and Washington forest fires continues to make haze in the valley.
A view showing the west and south sides of the Shop.
A shot of the 4'x2' windows below.  The builder had originally specified white, but we found out we could get them in Clay color.  We think that will blend better into the siding color.  We thought these windows were going to be non-operating picture windows, but we see that they are casement windows.  We think that may be a nice feature.
The two personnel doors are 3ft 6-panel steel doors.  These will be installed on the east side (next to the future house) one near the front and the other at near the rear of the Shop.
Last shot on Thursday, last work day for the week.  Next week we expect to see the gable end sheathing completed, personnel doors and 4x2 windows to be installed, and the Shop wrapped with house wrap.  It will be interesting to see how far the guys get.  They are about one week ahead of what we were anticipating today.