Time for a little ribbing...
This is a post about our Baby Back
Rib experiment. We have never smoked ribs before, or for that matter
anything BBQ related. Shilo has a nice early model natural gas Weber
grill that is set up to double as a smoker as well as a grill. We
thought we would have fun and try to smoke a couple slabs of Baby Back
Ribs, one of our favorites. We looked through procedures and recipes on
the Internet and You Tube and made up our own procedure from parts of
others we read about. Below we will step through our process in
delicious pictures, enjoy!
We started with making our
own rub; we used salt, black pepper, cayenne pepper, onion powder,
garlic powder, paprika, and rosemary. We wanted to hold back the brown
sugar until the finishing phase.
Two
slabs ready with rub. We applied mustard first then the dry rub to the
ribs. Then let the ribs "marinate" like this for 30 minutes to
overnight. We left ours for about an hour in the fridge.
We put the ribs back in the refrigerator just like this.
Shilo
and Steve (and Alex and Hunter, see them?) set to soaking a mess of
Hickory wood chips in water. We ended up soaking waaaay more than we
needed. We soaked the entire small bag. Half the bag would have been
more than enough.
OK,
it's time to light the smoker! We are looking to hold 225º F for 4-1/2
hours. Two hours with smoke, ribs unwrapped direct on the grates, 2
hours without smoke basted and wrapped in heavy duty aluminum foil, and
finally 30 minutes back unwrapped direct on the grates with finishing
rub or BBQ sauce to complete the procedure.
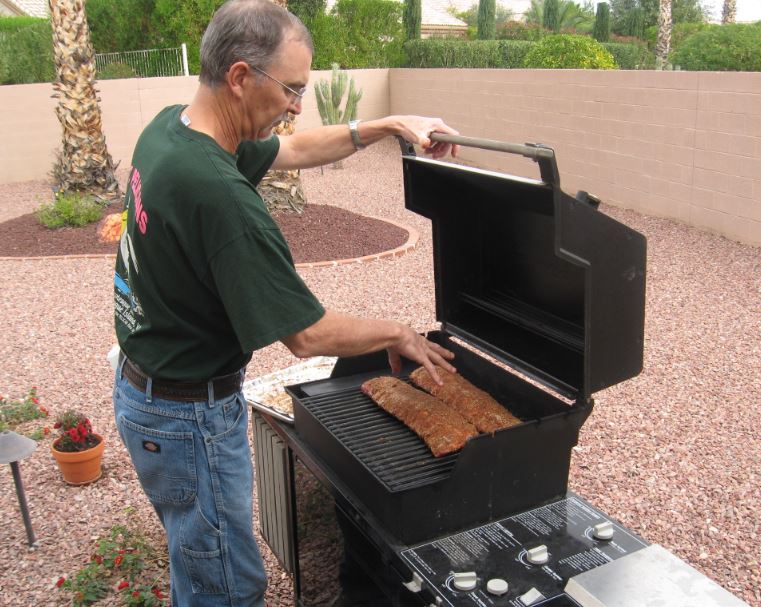
Here come the ribs ready to go on the smoker, may as well do this right and drink a beer!
Two rib slabs on the smoker meaty side up, and it looks like Steve is putting the "Be Delicious" spell on the ribs.
Shilo
and Steve check the ribs about 1 hour in. She is smoking now and Steve
adds more Hickory chips for good measure in a home made foil tray.
Two hours completed and now we remove the racks one at a time to baste and wrap in heavy duty aluminum foil.
Shilo
and Steve baste a rack. For our baste, we used apple cider vinegar,
water, vegetable oil, a tablespoon each of Worcestershire and soy
sauces, and the rub mix we made.
Steve wraps up rack #1 after basting.
First rack is back on the smoker, now the second rack comes off for basting and wrapping.
Both
racks are back on the smoker meat side down. We kept them there for an
additional 2 hours and no smoke is needed during this part of the
cooking.
The
second two hours is up. The racks are pretty well cooked and will be
easy to tear apart so gentleness is needed now. Look at the first rack
in foil coming off how it is sagging.
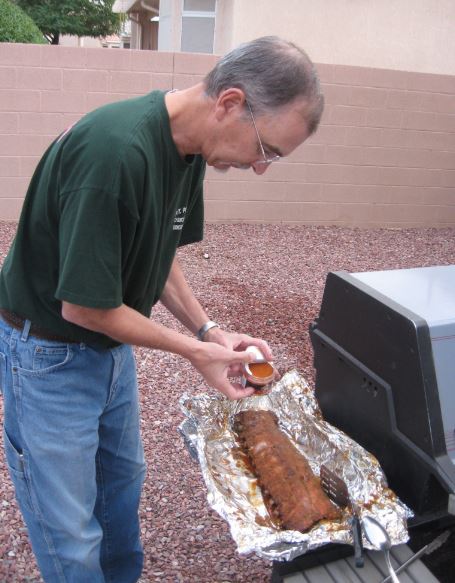
Steve
adds finishing rub to rack #1. This rub is store bought and has plenty
of brown sugar in it. 30 additional minutes back on the smoker
unwrapped will finish the ribs.
Rack #1 goes back on the grill meat side up for the final 30 minutes of finishing. Be careful Steve, don't rip the ribs!
Rack #2 gets a Stubbs BBQ sauce finishing treatment.
Steve poured a bit on then used that spoon to spread the sauce around.
Voila, ready for the finish phase.
We
decided to add finishing rub and Stubbs to the back side of the ribs
after they were back on the grill. This took a bit more flipping of the
ribs, but no ribs were harmed so it was OK. Next time we will finish
both sides before we put them back on the grill.
Steve adding Stubbs to the back of rack #2.
Through the magic of Blog, the ribs are finished! Rack #1 ready for inspection.
Rack #1 cut, rack #2 resting.
Steve cuts rack #2, these ribs smell great!
Shilo and Steve raise a glass to good BBQ eats. Many thanks to Gari for documenting the procedure.


Looks Good! Just a couple things about ribs that I learned. 1) There is a membrane that you should pull off the back of rack of ribs and throw away. 2) Always take your dry rub and rub down those puppies and place in the fridge overnight or at least 8hours min. in the fridge. 3) Use your wet sauce when the ribs are about to come off (usually 30mins prior of being done). 4) have some dry rub and sauce at the table for some peoples palates would like more? Just my suggestions and experiences passing along. Bon Appetit'!
ReplyDeleteGreat suggestions! We did remove the membrane and that does make a huge difference.
DeleteYou betcha! I never knew about that darn membrane until I started watching the Nealy's on Food Network and then went to their place in Memphis, man what a difference for sure!
DeleteEnough "beverage" during the process to satisfy your thirst...
ReplyDeleteMandatory!
Delete