We arrived in Yuma on December 27th Steve with a cold and Gari soon to contract the same virus. It rained about half of the 180 mile trip from Sun City. Sort of a rough start for Yuma 2020. After a couple days of rest we were getting back into the swing of things with Alan and Janice on their new Fortuna Foothills lot.
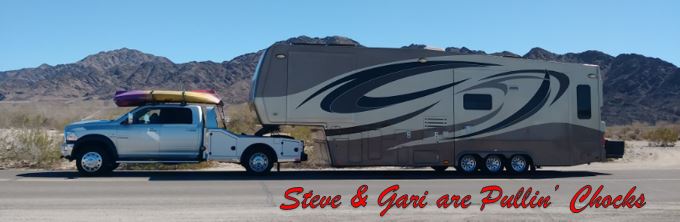
Below looking to the east, Romeo the Ram and Penelope the 5th Wheel trailer are parked in the foreground of the Gila Mountain Range. What a great view that Alan & Janice have on their new lot!
Frame left below you can see the Copacabana all set up. More about that later.
Once we got through our colds, the four of us worked together to raise the Copacabana. The picture below captures the just completed cabana and Alan carries the first item of furniture to the 5 o'clock club.
Looking down the street to the North.
The sun is ready to breach the mountains at about 8:30 AM today.
A view of the setup from across the street looking to the west.
We drive onto the lot from a gate at the south lot line. Copacabana is conveniently located just outside our door!

A photo below of our dark side, that is, the side with the utility hookups. This lot has full hook ups with 50A electric service. Gari has the 75 ft orange garden hose out and has already started to wash the truck and trailer, which is a multi-day process. The rain on the trip down made a lot of road grime on the vehicles. While the 75 ft light duty 5/8" orange hose is more unwieldy to handle and store, we find that it reaches everywhere we need around the trailer and truck for washing. We carry this larger orange hose on top of the truck spare when moving. A couple velcro straps keeps it in place - - no problemo. We place black pipe foam insulation on our hoses and electric cable that are exposed to the sun everyday. We believe this extends the life of that equipment by more than a year. We use white vinyl gutter for the slope and cover of the 3 inch flexible sewer hose. This makes for a quick and easy setup that provides a nice drain slope and also protects the vinyl sewer hose from the Sun's UV and other thirsty pecking and chewing varmints. We think it looks a bit tidier too. For the sewer hose we like the Valterra 20 ft sewer kit. The Valterra has a universal bayonet connection on each end of the hose, allowing for use with various fittings depending on the setup conditions and layout. The Rhino hoses that appear locally everywhere only has universal bayonet connection on one end, requiring the use of the Rhino exclusive fitting on the sewer entrance end. The Rhino hose neither snaps into form as well as the Valterra model. We find that the Valterra sewer hose kit has to be ordered as we rarely see it available in local stores anywhere. Our fresh water setup includes a nice spring loaded water pressure regulator with a pressure gauge, we like the Valterra model here also. We place that regulator right on the shore water hose bib. We wrap a hand towel around the regulator and secure with a Velcro strap. This hides the expensive regulator a bit, also keeps the gauge out of the sun. Right after the regulator we add a nice brass Y with two 1/4 turn ball valves. One side serves the fresh water service to the trailer and on the other outlet we place a 25 ft wash hose with a nice spray nozzle. This comes in handy quite often when we are doing chores and projects outside the trailer. We had purchased a nice 50' rubber hose and cut it in half for use in two places. The wash hose just described is the first piece, the remaining 25 ft piece we use for the black tank flush hose. We find several advantages to this approach. The 25 ft hoses are very easy to handle, setup and tear down for storage. Keeping the black tank flush input connected this saves time and effort when dumping the black tank each week or so. The fresh water service coming out of the Y port leads directly into a sand filter. That is the blue standard 10 inch cartridge filter seen at the underside of the trailer below. Inexpensive 10 micron "sand" filter cartridges are readily available locally pretty much everywhere. At the output of the blue sand filter we place a second Y valve. One side carries the red rubber black tank flush hose to the inlet at the trailer's wet bay. The second outlet carriers the fresh water to the ion exchange water softener. We place the water softener tank underneath the slide out protecting it from extended exposure to direct sunlight. Further we hang shade screen at the slide skirts to further shade the trailer tires, water hoses. electric cables and to further hide the water softener equipment from sight.

A view below of the clean back cap after washing earlier today.
The clean windows on the back cap provide a clear view to the Gila Mountains to our north.
We have an update.... washing was not enough. The Energizer Bunny has now completed waxing of the back cap! #willworkcirclesaroundme
Copacabana is now completely outfitted with furniture and is open for business! Soon it will be 5 o'clock at the Copacabana and the regulars will gather here.
Further updates: It is now officially 5 o'clock somewhere!
5 o'clock view from Copacabana as the setting sun repaints the Gila Mountains.


No comments:
Post a Comment